Fogged headlight lenses not only make your car look tired but also restrict the amount of light illuminating the road ahead of you. Headlight restoration kits are cheap and can produce dramatic results.
" fill-opacity=".3" d="M0-111h1200v397s-252.211 51.289-538.449 54C375.312 342.711 0 292 0 292v-403Z"/%3E%3Cpath fill="url(%23b)" d="M1-114h1199v378s-252 51.289-538 54C376 320.711 0 270 0 270v-384Z"/%3E%3Cpath fill="url(%23c)" d="M0 60h1200v188s-327 63.289-613 66C301 316.711 0 273 0 273V60Z"/%3E%3Cpath fill="url(%23d)" d="M0 60h1200v188s-327 63.289-613 66C301 316.711 0 273 0 273V60Z"/%3E%3Cmask id="e" width="1201" height="255" x="-1" y="60" maskUnits="userSpaceOnUse" style="mask-type:alpha"%3E%3Cpath fill="%23EEF1F6" d="M0 60h1200v188s-327 63.289-613 66C301 316.711 0 273 0 273V60Z"/%3E%3C/mask%3E%3Cg mask="url(%23e)"%3E%3Cmask id="g" width="1438" height="328" x="-124" y="-13" maskUnits="userSpaceOnUse" style="mask-type:alpha"%3E%3Cpath fill="url(%23f)" fill-rule="evenodd" d="M-123.5 258.5-109-13h1395l27.5 245c-232.5 34.5-487.705 80.384-725.581 83-237.486-2.721-265.419-4-711.419-56.5Z" clip-rule="evenodd"/%3E%3C/mask%3E%3Cg mask="url(%23g)"%3E%3Cpath fill="%23FEF3C7" fill-opacity=".05" d="M774.502 1161.55c72.001-3.83 144.529-16.6 217.321-38.74C1514.56 964.017 1919.92 369.717 2099-392.74 1846.08 72.142 1341.28 313.096 774.502 323.314 207.726 312.671-296.808 72.141-549.998-392.74-370.919 369.717 34.449 964.017 557.181 1122.81c72.792 21.71 145.32 34.48 217.321 38.74Z"/%3E%3Cpath fill="%232070E8" fill-opacity=".25" d="M1243.34 184.225c102.44 30.548 204.48 74.055 305.68 131.036C2275.79 724.198 2778.24 1714.59 2935.35 2866.48 2634.05 2114.1 1943.59 1594 1134.58 1382.03 322.864 1199.88-429.69 1367.89-852 1944.02-497.039 916.86 159.636 208.787 927.603 163.907c106.887-5.677 212.247 1.329 315.737 20.318Z"/%3E%3Cpath fill="%23FEF3C7" fill-opacity=".05" d="M1232.5 70.76c104.07 5.535 208.91 23.986 314.13 55.967C2302.21 356.131 2888.15 1214.7 3147 2316.21 2781.41 1644.6 2051.75 1296.5 1232.5 1281.74 413.251 1297.12-316.027 1644.6-682.001 2316.21-423.151 1214.7 162.788 356.131 918.372 126.727 1023.59 95.361 1128.43 76.91 1232.5 70.76Z"/%3E%3Cpath fill="%23154A99" fill-opacity=".29" d="M421.155 420.269c113.733 46.994 226.413 108.503 337.53 185.053C1556.67 1154.75 2075.77 2329.98 2199.28 3644.03 1895.3 2761.18 1143.24 2091.29 243.733 1753.08c-903.919-305.05-1757.473-209.22-2258.663 386.12C-1568.66 1028.61-797.982 313.945 67.226 358.413c120.398 6.829 238.484 27.723 353.929 61.856Z"/%3E%3C/g%3E%3C/g%3E%3Cdefs%3E%3ClinearGradient id="a" x1="600" x2="600" y1="-92" y2="449" gradientUnits="userSpaceOnUse"%3E%3Cstop offset=".336" stop-color="%23007EE5"/%3E%3Cstop offset="1" stop-color="%2363D9EA"/%3E%3C/linearGradient%3E%3ClinearGradient id="b" x1="600.5" x2="600.5" y1="-114" y2="427" gradientUnits="userSpaceOnUse"%3E%3Cstop offset=".336" stop-color="%23007EE5"/%3E%3Cstop offset="1" stop-color="%2363D9EA"/%3E%3C/linearGradient%3E%3ClinearGradient id="c" x1="647" x2="647" y1="60" y2="319" gradientUnits="userSpaceOnUse"%3E%3Cstop offset=".052" stop-color="%23007EE5"/%3E%3Cstop offset=".514" stop-color="%231561D4"/%3E%3Cstop offset=".938" stop-color="%2300A0B5"/%3E%3C/linearGradient%3E%3ClinearGradient id="d" x1="647" x2="647" y1="60" y2="319" gradientUnits="userSpaceOnUse"%3E%3Cstop offset=".282" stop-color="%23007EE5" stop-opacity="0"/%3E%3Cstop offset=".822" stop-opacity=".3"/%3E%3C/linearGradient%3E%3ClinearGradient id="f" x1="588.5" x2="588.5" y1="-13" y2="499.532" gradientUnits="userSpaceOnUse"%3E%3Cstop stop-color="%23154A99"/%3E%3Cstop offset="1" stop-color="%2363D9EA"/%3E%3C/linearGradient%3E%3C/defs%3E%3C/svg%3E)
How To Clear Foggy Headlights
Kits That Make Your Headlights Sparkle
Money Saved: About $40
Time Required: 30 minutes to 1 hour
See Edmunds pricing data
Has Your Car's Value Changed?
Used car values are constantly changing. Edmunds lets you track your vehicle's value over time so you can decide when to sell or trade in.

Tools Required:
- Latex glove
- Electrician's tape
- Buffing wheel (optional)
- Sponge
Materials Required:
- Headlight restoring kit
- Newspapers
- Water

In the photo above are two different headlight restoring kits, the Turtle Wax Headlight Lens Restorer (typically sold for about $10) and Sylvania's Headlight Restoration Kit, selling for about $20. There are many other kits available at different prices, including some that include a buffing wheel to eliminate the manual labor.

Most headlight restoration kits include an abrasive compound and sandpaper (in grades of varying roughness) to remove the outer layer of yellowed, oxidized plastic and clear the lens. Some include a buffing wheel that can be attached to a power drill. One YouTube video even shows headlights being cleaned with toothpaste (which is slightly abrasive) and a clean cloth towel.
One difference between the two kits — and probably the reason for the price difference — is that the Sylvania kit includes a glove, tape and a liquid "UV Block Clear Coat" to protect the lens from refogging once it has been cleaned. I have one gripe with the Sylvania kit, because the clarifying compound comes in a little packet that can't easily be stored. This means this kit will probably be a one-shot deal. The Turtle Wax kit doesn't have the extra goodies, but the pads can be reused and the bottles contain a larger amount of the clarifying compounds.
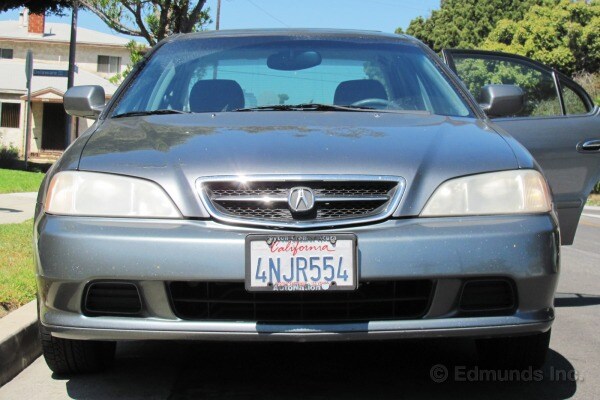
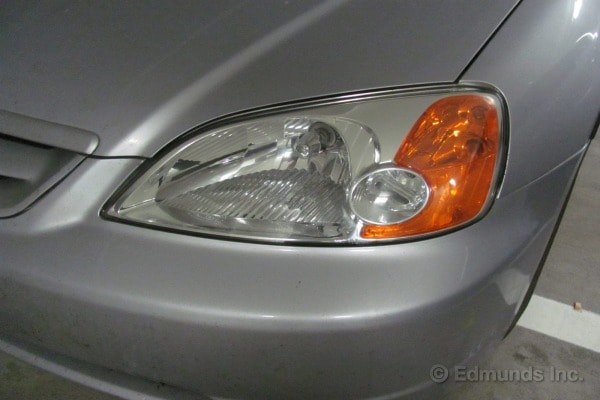
To be clear (so to speak), what we're actually tackling in this project is the plastic lens covering the headlight bulbs, as shown on this 2001 Acura TL. This plastic lens protects the headlight from dirt and debris blown around on the road. Over time, these lenses become scratched, pitted and clouded by exposure to the sun. Replacing the lenses is expensive, so many car owners opt just to clean them.
The following steps are an overview of the ones I took with these two kits. Whichever kit you use, make sure you follow the included directions carefully. Use the products in the correct order and keep in mind that the headlights won't look clear until you are finished and the residue is washed off.

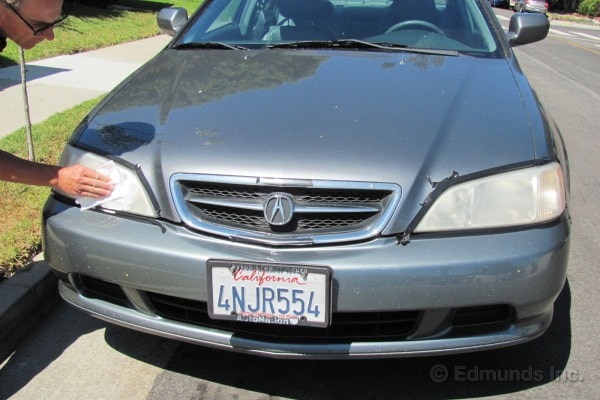
I use the electrician's black tape from the Sylvania kit to protect the paint around the headlights from the abrasive compound and to ensure I don't accidently scratch the paint with sandpaper. The electrician's tape is particularly good for this task because it pulls off easily when you are finished without leaving any sticky goo on your car's paint. You might also consider using extra protection and tape some newspaper onto the car to protect the finish. Once you start getting into the project and the how-to zeal takes hold, the compounds tend to fly onto painted surfaces.7
I have used the Turtle Wax kit on the left headlight and the Sylvania on the right. I applied the Turtle Wax products in two stages, rubbing on the lens-clarifying compound first to see if that did the job.
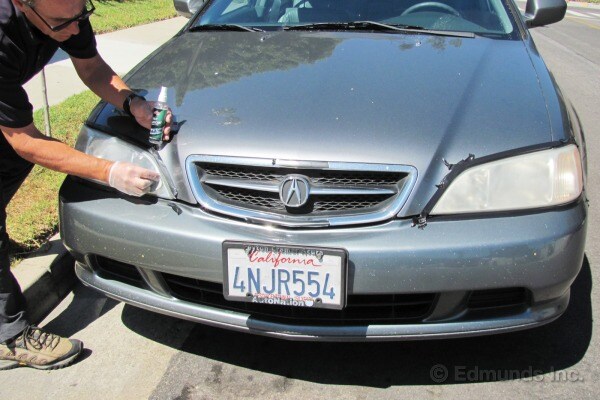
If the clarifying compound doesn't get results, you spray on the lubricant and use the abrasive pads. I use both chemicals for this test.
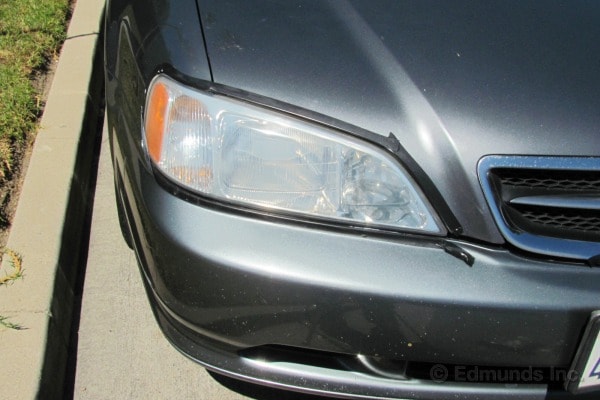
With about 10 minutes of work, here's what the left headlight looked like. Not bad.
The Sylvania kit called for washing the headlight lens with a surface activator. Then I applied the clarifying compound from the packet to the different levels of sandpaper for sanding and polishing the lens. Finally, I applied the UV Block Clear Coat.
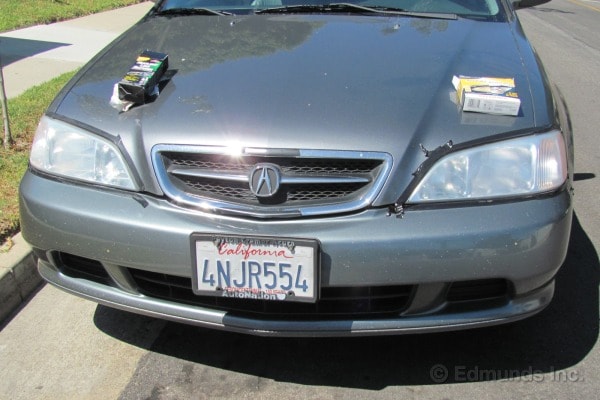
Here's what the headlights look like after applying the products from the different kits and sanding each one for about 15 minutes.

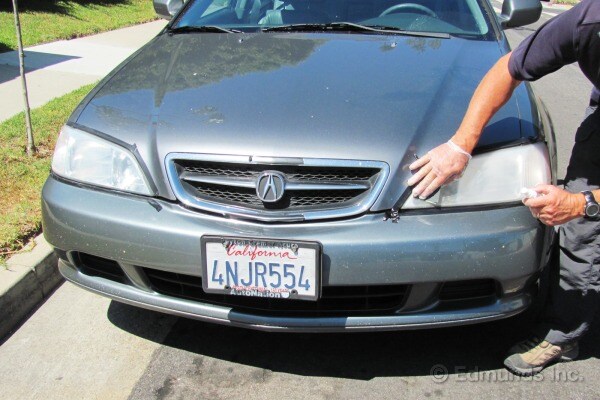
I then tried the Sylvania kit on another car with more seriously fogged headlights.
I spent more time reading the directions this time and the results were better.
Clearing your headlights is easy, inexpensive and the results are satisfying. Once you do it and see how it sharpens up the look of your car, you'll find yourself recommending it to all your friends with older cars. Even better, there might be a little more from your headlights when you're driving at night.
SPONSORED CONTENT
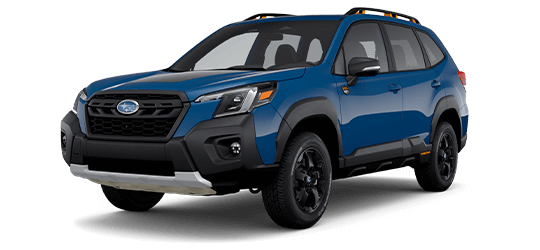
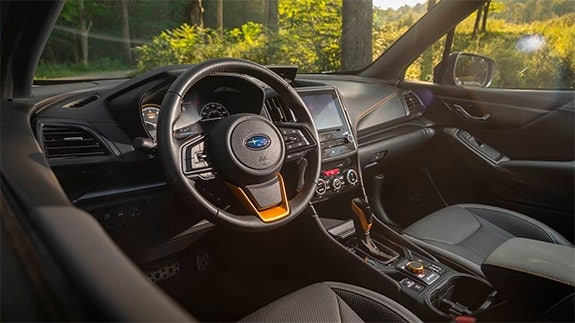
2024 Subaru Forester Wilderness
SPONSORED CONTENT